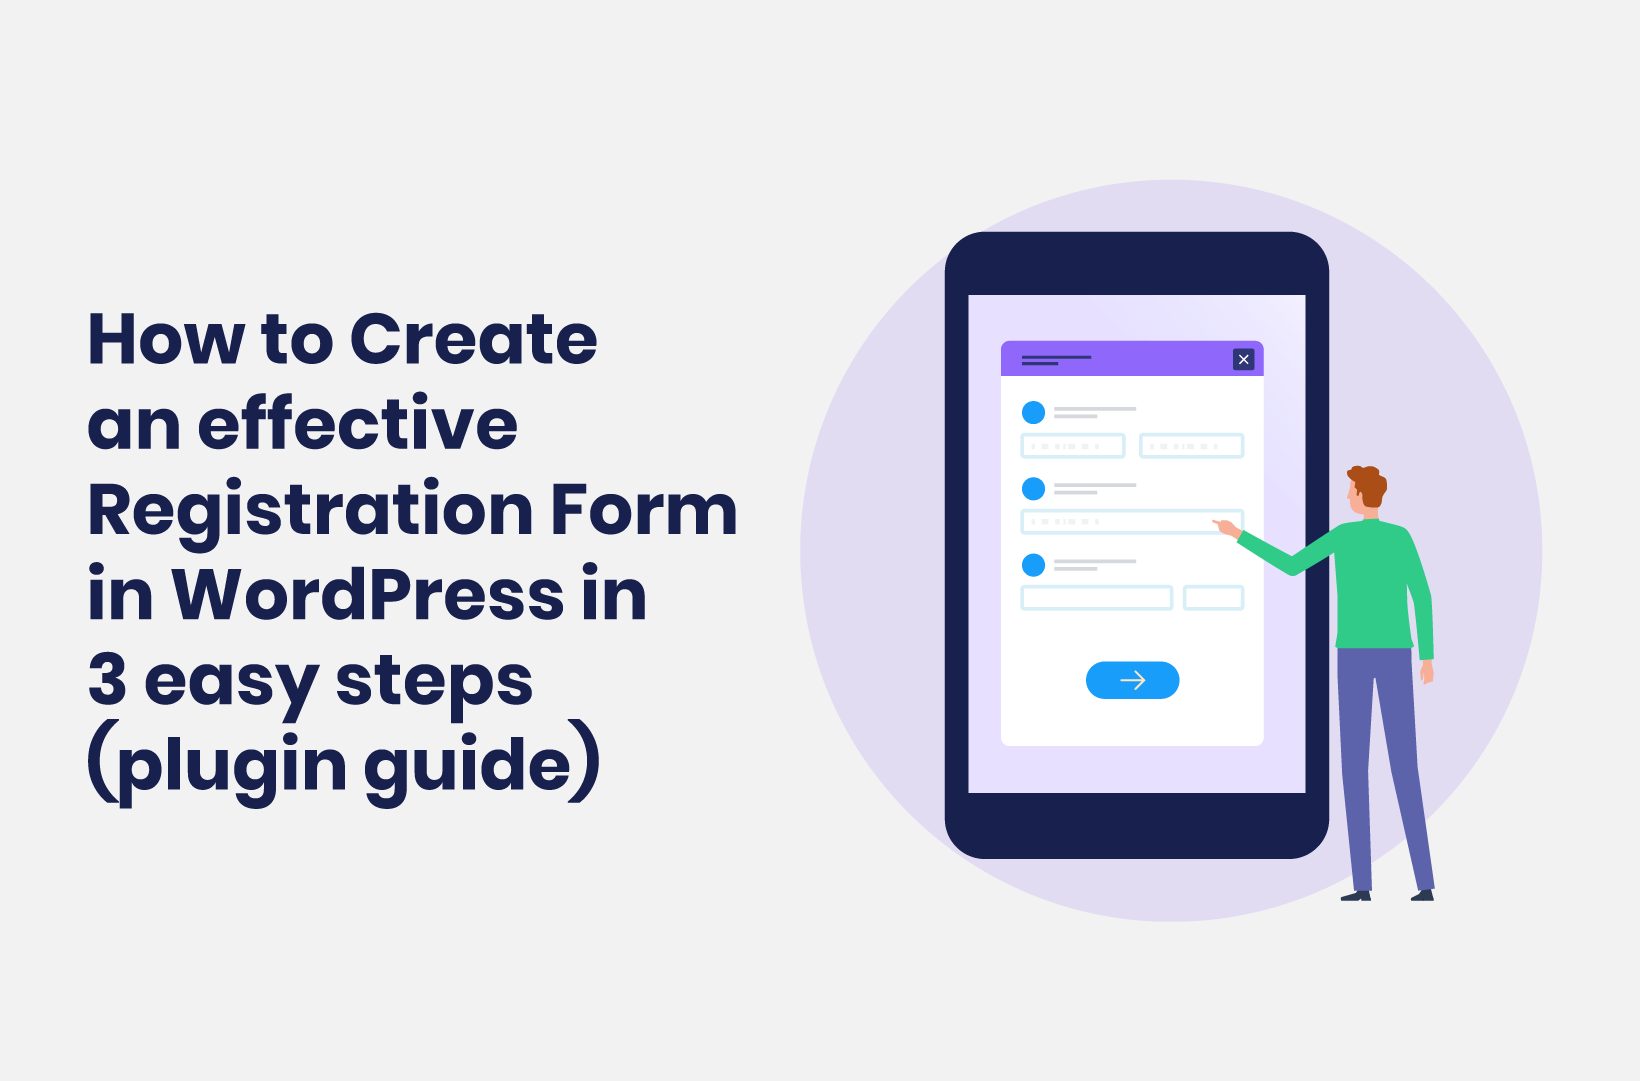
How to Create an Effective Registration Form in WordPress in 3 Easy Steps (Plugin Guide)
One of the best ways to collect user data is through forms. This post will show you how to build a custom WordPress registration form!

In many cases, you can get away with using a generic contact form on your site. However, if you want to collect more accurate and detailed user information, a custom WordPress registration form is vital. What’s more, creating one can be a piece of cake with the right tools to hand.
On the whole, forms are the way to collect visitor information on your WordPress site. If you want to improve your products and services, forms will be a central component. Not only that, you can capture leads and make your site’s forms something to build your sales funnel around.
For this tutorial, we’re going to show you how to create a custom WordPress registration form using one of the best plugins for the task, step-by-step. First, though, we’re going to look at why lots of sites use registration forms, then dig into what makes for a good form.
Why do websites use registration forms?
Most sites will build their core interactivity around forms. After all, if a visitor or potential customer needs to send their details your way, register for an event, ask a question, or do myriad other tasks, they will use a form to do so.
A form is arguably the best way to collect information on your website. This is because you can adapt this versatile functionality to almost any use case. For example, a user can fill out a simple form to contact you. In contrast, they can spend time with a multi-page signup form to register for your services.
The data you gather from a custom WordPress registration form can help you understand your user base, which in turn lets you improve your offerings. However, that’s not all. You can also use the data you collect within your sales and marketing, such as remarketing strategies, newsletter campaigns, and more.
What makes a good registration form?
There is no single component that makes for a great custom WordPress registration form. Instead, it’s a combination of different elements that make up the whole. This will include its design, how easy it is to use, what it contributes to the User Experience (UX,) and its functionality.
Compared to ‘passive content,’ interactive content on a website can generate double the number of conversions. What’s more, interactive content is a near-perfect way to educate a visitor on what you do and the products you sell.
As such, a high-converting custom WordPress registration form should often include the following:
- Both a new user and an existing one should be able to navigate and understand the form with ease, regardless of its complexity.
- Styling options to make sure the form aligns with the design principles of your entire site.
- Its fields should be relevant to your focus and purpose for the registration process. For example, a lead generation form may want to only ask for an email address and first name.
- You’ll only want to collect relevant and purposeful information too. For instance, the lead generation form might not want to ask for a date of birth – at least, not at the initial capture stage.
- Conditional logic will help you make sure that all of the questions have relevance, which will reduce the number of fields the user has to fill out. This will boost the UX of your form, save them time, and increase your conversion rates.
- You’ll also want to ensure that you can connect third-party apps and services, such as email marketing platforms, social media, and your Customer Relationship Manager (CRM.) Automation integration through a service such as Zapier could also help you process the data you collect in a flash.
Once you understand the makeup of a custom WordPress registration form, you’ll need to decide how to create one. In the next section, we’ll discuss this.
How to create an effective custom WordPress registration form
WordPress is a full-featured Content Management System (CMS) but doesn’t include by default registration form creation functionality. As such, you’ll have two options to add in a custom WordPress registration form:
- Manual coding. You’ll need technical knowledge, including HTML, CSS, PHP, and JavaScript, to implement a form. Also, you’ll have to have knowledge of WordPress’ core files and structure.
- Use a dedicated form builder plugin. This is the typical and recommended way to add new functionality to WordPress. You can save time, money, and effort with a plugin. What’s more, you will often get a greater set of features and functionality than you can implement yourself – all without coding knowledge.
A manual approach will suit if you have technical knowledge, a healthy development budget, the many hours of time it will take to develop your form, and resources to maintain your form. Coding a custom WordPress registration form can give you complete control over your form and provide the ultimate scope.
However, for everyone else (and especially beginners), a plugin will be the perfect fit. In the next section, we’ll show you how to choose the right plugin for the job and introduce our favorite.
How to choose the right WordPress form builder plugin
You have swathes of choice when it comes to WordPress registration form plugins. However, most of the options at your disposal don’t have the usability, feature set, or versatility of the very best in the field.
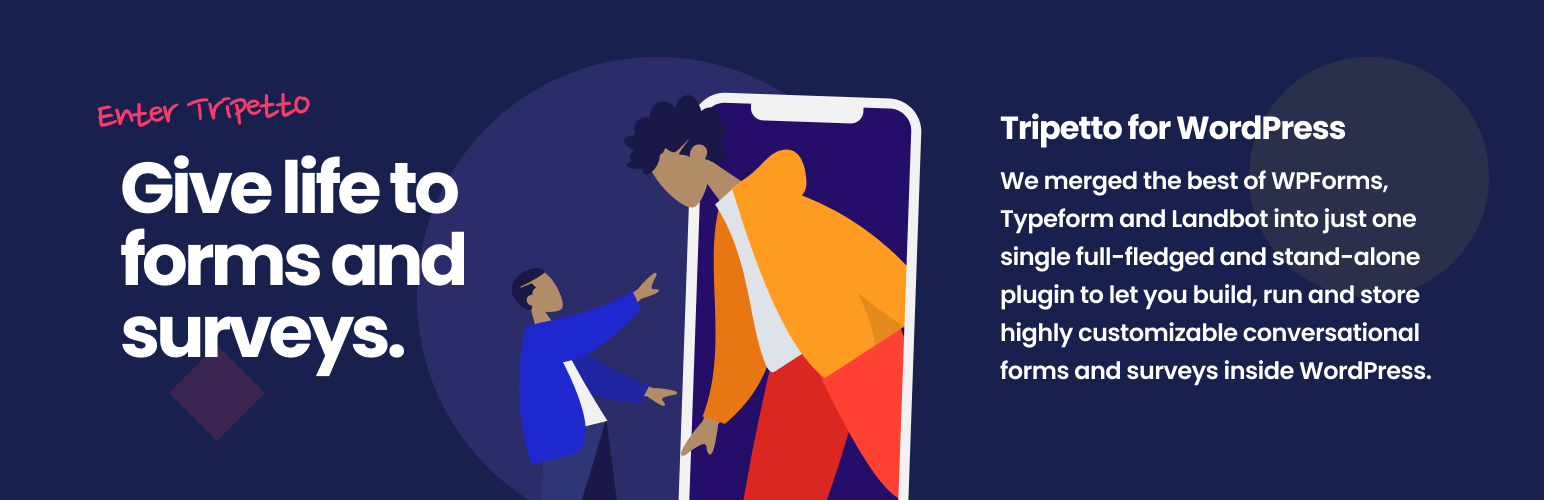
Introducing Tripetto
Tripetto lets you create powerful, versatile, and conversational smart forms with deep customization options, all from the WordPress dashboard. It lets you collect and store all of the form data inside WordPress, which means you don’t have to worry about the data policies for third-party platforms.
Compared to the competition, Tripetto can offer a stellar set of features and functionality in the form of the following benefits:
- The User Interface (UI) is simple to digest and easy to use. For instance, it uses a drag-and-drop form builder, which gives all users the ability to create a professional form – not just developers.
- You have the ability to create customizable, conversational smart forms that use natural language with the user. This means you can change almost everything about your form’s design to suit your purpose.
- There are lots of ways to implement different conditional logic types, such as branch logic, piping logic, and much more. This standout feature of Tripetto lets you create relevant and personal custom WordPress registration forms that will encourage greater engagement from your respondents.
- You can showcase your registration form wherever you require on your WordPress site using Tripetto’s provided shortcode, Elementor widget, or Gutenberg block, depending on your preferred page builder.
Your designs can start with a template, from which you’ll choose a ‘form face’. These are custom ‘skins’ for your form – unique to Tripetto – that won’t change the underlying functionality. This means you can present your form in a classic style, one that autoscrolls, or a unique chat form face that promotes conversational questions and answers.
You also won’t need to use third-party infrastructures or platforms to store and process your form data. Tripetto includes all of this within your WordPress installation. As such, you have a secure and private setup to create your custom WordPress registration form.
Using Third-Party Services With Tripetto
However, if you do want to extend the functionality of Tripetto in order to pull in your favorite or necessary third-party services, you can do so.
Tripetto lets you use an automation service such as Pabbly Connect, Zapier, or Make to connect to thousands of other services.

For example, you can connect to Google Drive, Mailchimp, and many more using webhooks. This will save you time and keep you away from third-party dashboards.
How to set up a custom WordPress registration form using Tripetto (in 3 steps)
Over the rest of the article, we’ll show you how to create a custom registration form using Tripetto. It’s a three-step process that involves design, automation, and testing. To start, let’s look at the layout design.
1. Design Your Layout Using Templates and the Storyboard Editor
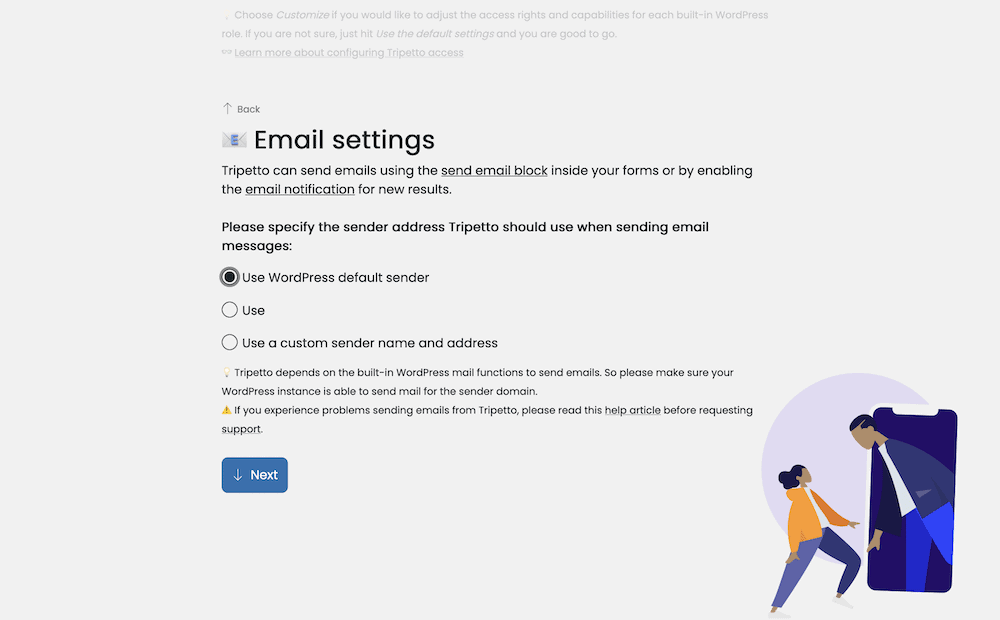
Before you begin to create your custom WordPress registration form, you’ll need to install and activate the Tripetto plugin. This follows the same typical approach of other WordPress plugins, so you should have Tripetto ready to roll in minutes.
From there, you can run through the Onboarding Wizard, which will help you with Tripetto’s form settings:
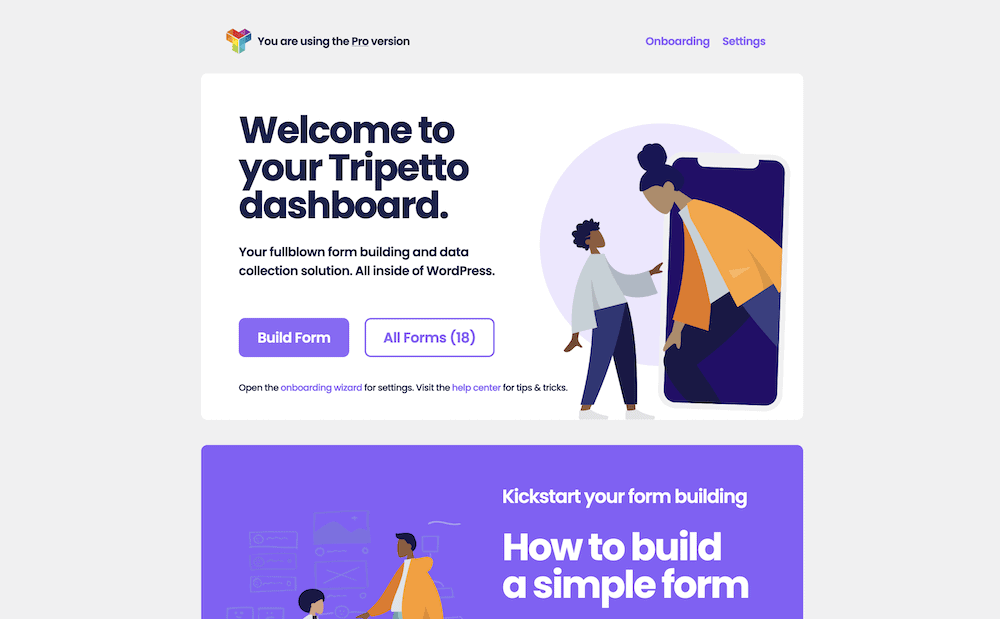
Once you complete all of this, you can begin to create a form from the Tripetto dashboard within WordPress:
The first step is to choose a layout for your form. There are myriad options here. We’d suggest you choose a template from the Tripetto library that best matches your needs:

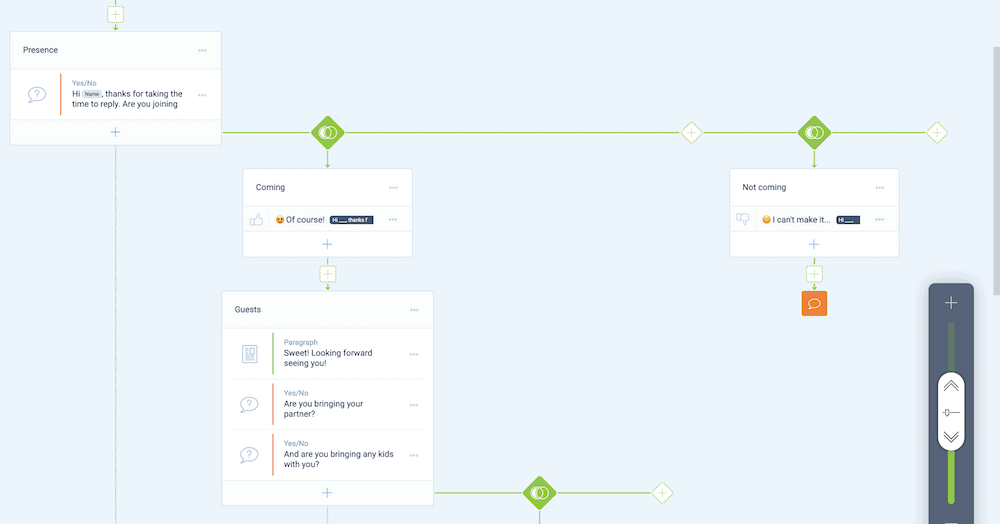
From there, you will come to the Tripetto storyboard, which presents your form in a ‘flowchart style’. This is where most of the work to create your custom WordPress registration form takes place:
While there are lots of styling options to choose from, this isn’t going to be your first port of call. There are a few different aspects of Tripetto that you’ll want to focus on, starting with the form face.
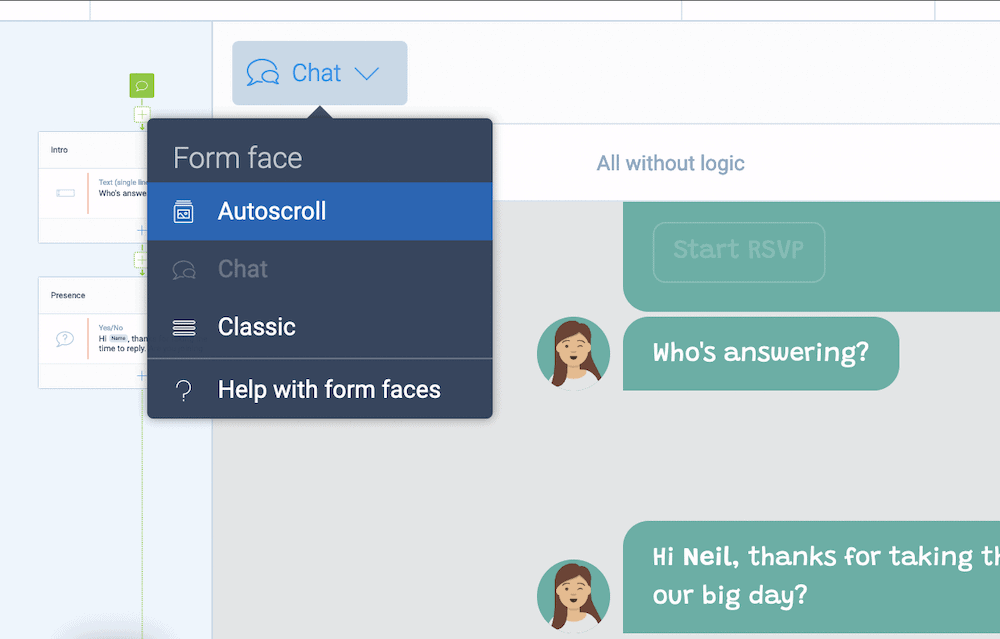
Choosing a Form Face
You’ll likely want to choose the right form face for your needs. There are three to select from:
- Classic. This is a typical form type that presents the form fields without any other interactivity.
- Autoscroll. This form face scrolls through each question in order to highlight it. It’s perfect for busy forms.
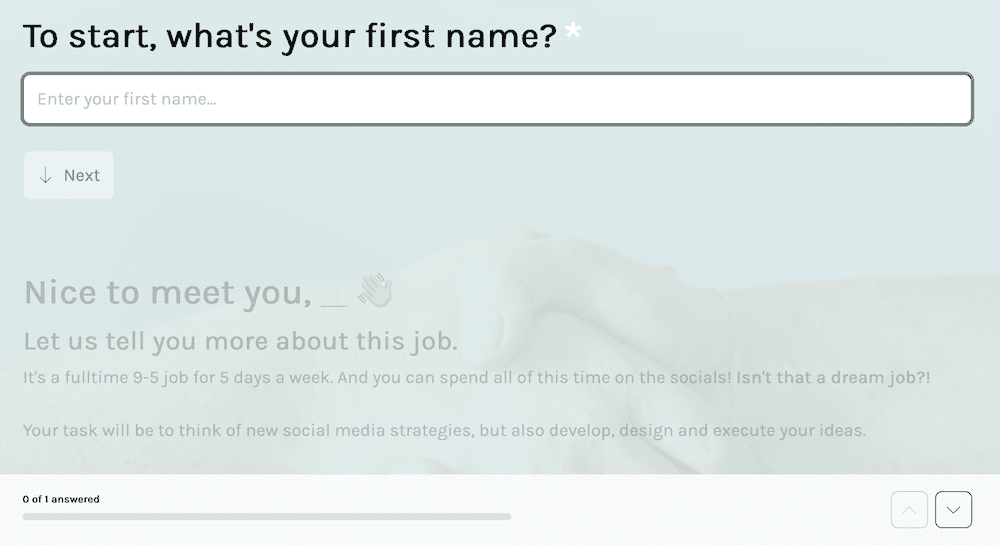
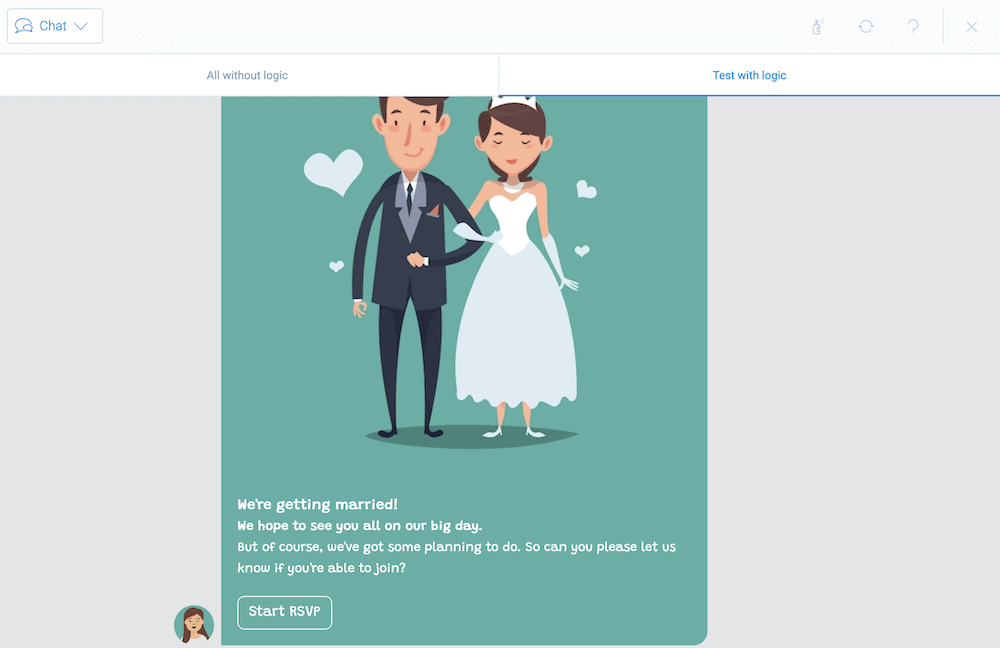
- Chat. If you want to create a natural language conversation, the chat form face will let you do it. It’s a good way to interact with the respondent in a question-and-answer style.
It’s also straightforward to switch between the form faces. You’ll do so from the right-hand menu in the storyboard. To choose a new form face, select one:
Once you set up a template and form face, you can begin to customize the question types in your form.
Adding Question Block Types
Tripetto uses form blocks to build your form’s content using a drag-and-drop builder. Question Blocks are a key component, as this is how you’ll offer variety and relevancy within your form. There are so many Question Blocks available that we can’t cover them all here. However, we can offer some insight into how to choose the right one for your needs.
First, figure out what sort of input you’d like from the respondent. For example, you might want an answer as text input, numbers, or date entry:
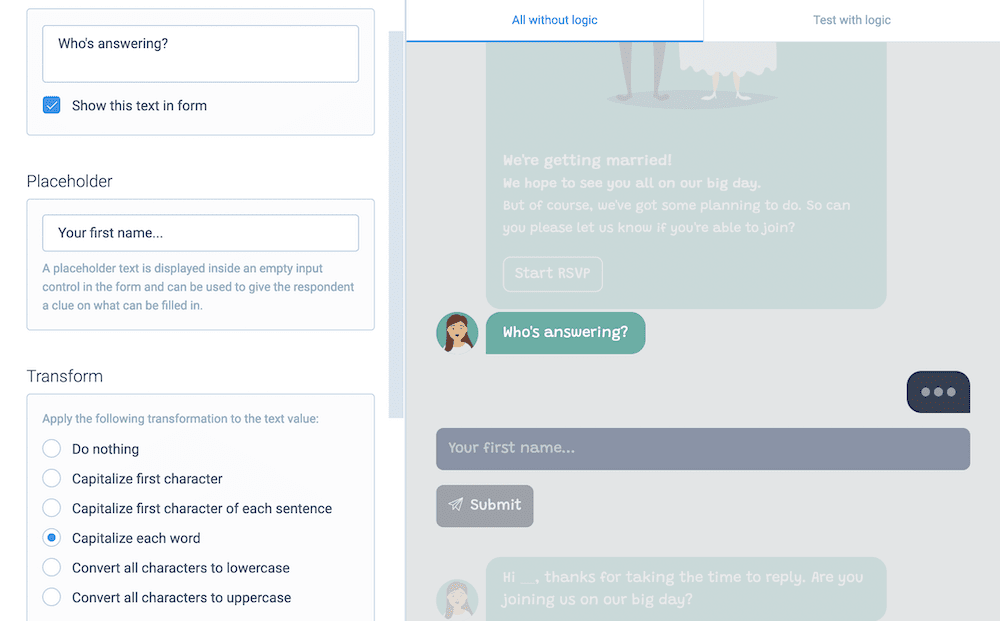
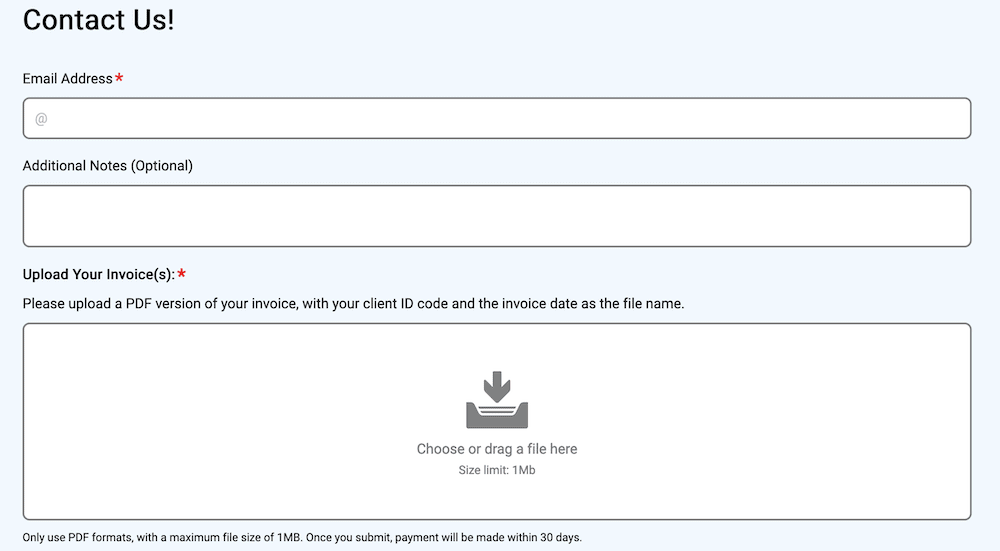
From there, you can choose a suitable Question Block. Tripetto offers single-line or multi-line text fields, for instance. You can even offer dedicated user email, password, or URL form fields:
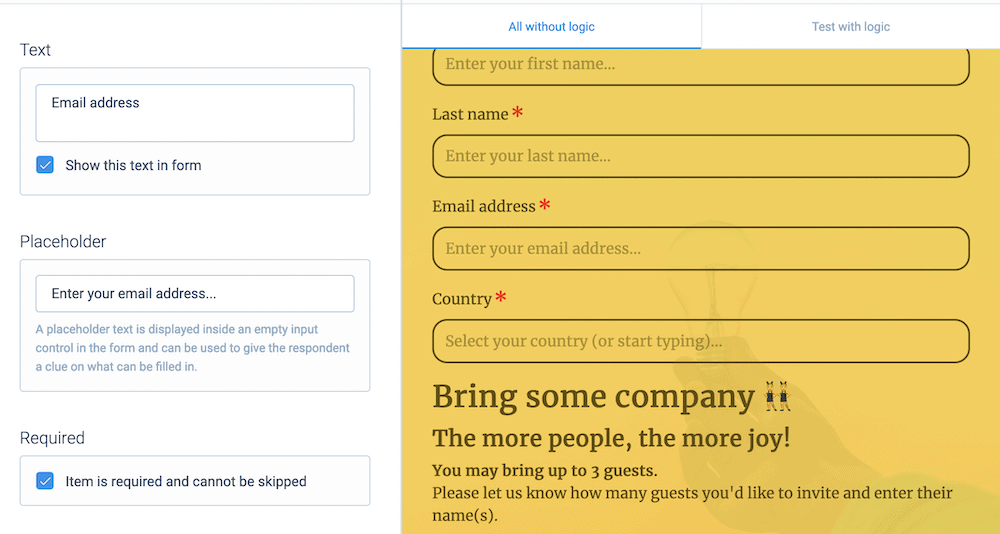
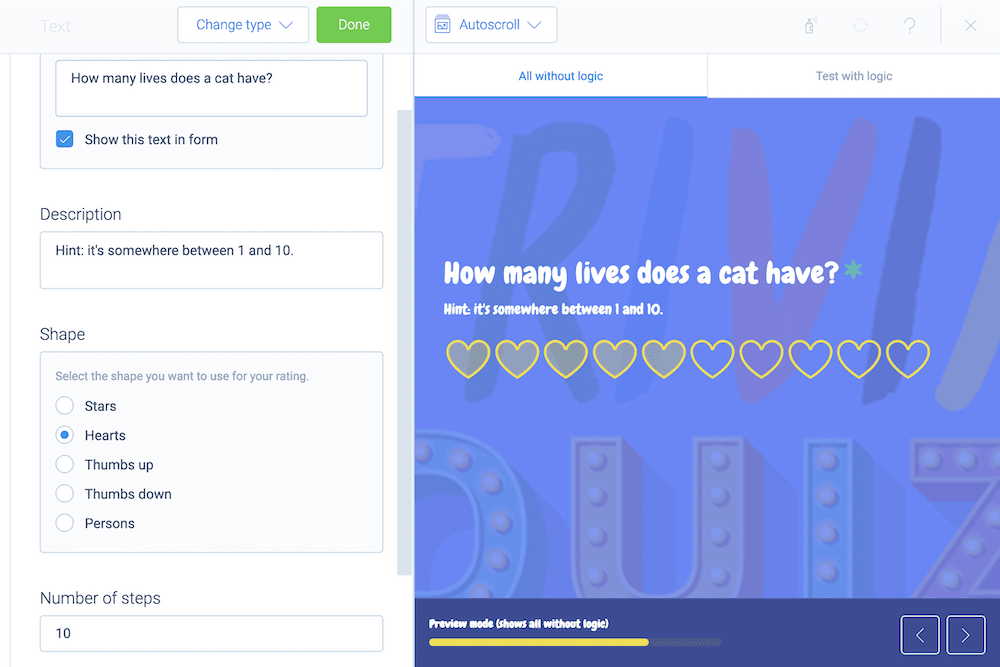
Tripetto also offers lots of other types, such as date pickers, number-only entry fields, and telephone entry. However, you get more than just text and numbers. You can also choose the Picture Choice Block to provide some visual variety:
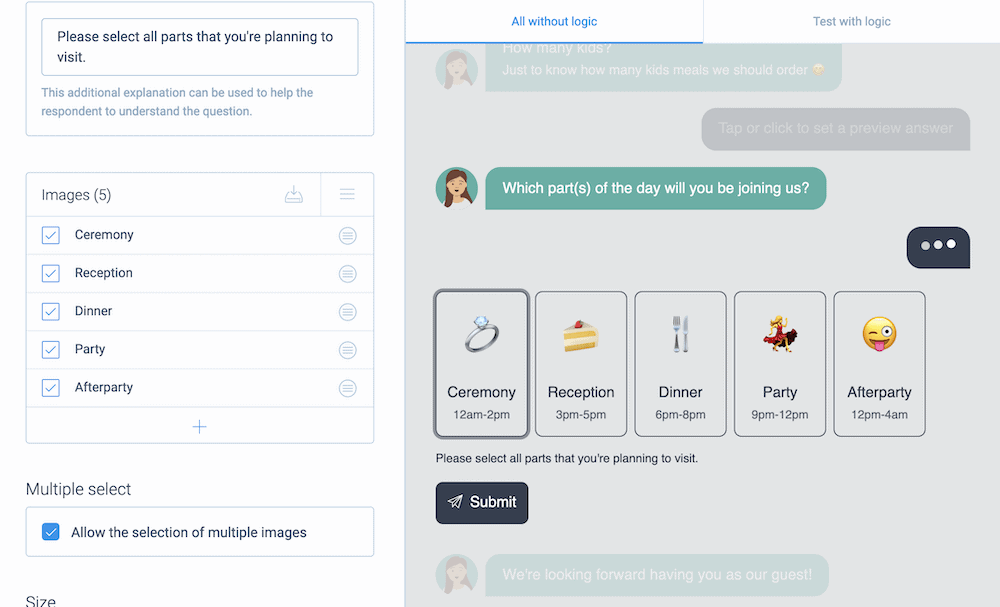
In addition, you get a whole host of drop-down menus, radio selection buttons, Likert scale options, and much more.
However, in order to make the most of them, you’ll want to employ conditional logic to only display relevant questions to your respondents.
Building Conditional Logic Into the Form and Recalling Values
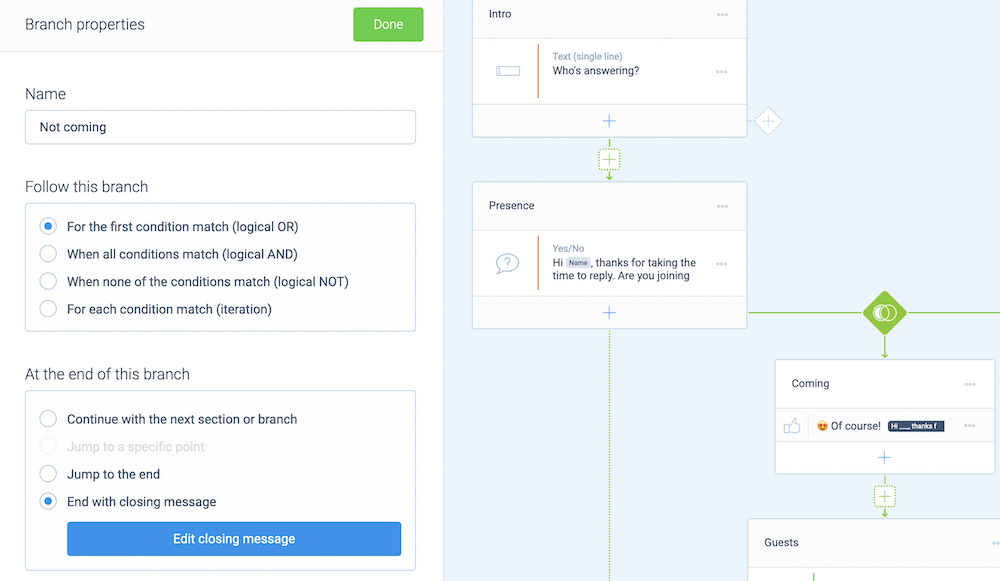
Tripetto includes multiple ways to implement logic in your forms: branch logic, jump logic, piping logic, and display logic. These all make your form relevant, fun to fill in, and interactive.
For instance, you could use display logic to show or hide questions based on previous answers. Jump logic can help you skip over irrelevant questions, in case display logic isn’t the right fit for a question.
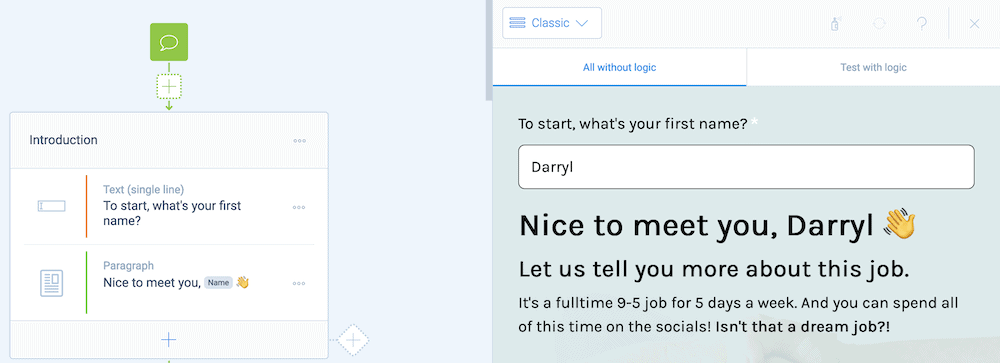
You can also use piping logic to personalize your forms. This type of logic uses previous answers as elements in later parts of your form. For example, you can ask for a name, then reference it in a future question:
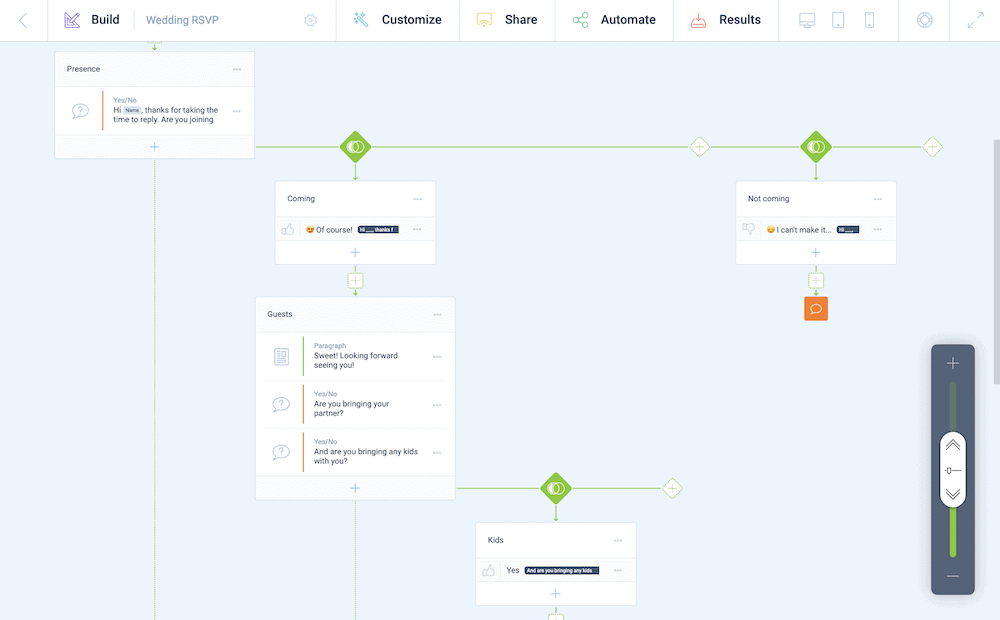
While you’ll pick and choose when to use display, jump, and piping logic, you’ll likely use branch logic a lot. This lets you move the respondent through different paths within your form, which again increases how relevant your form is.
Once you complete the functionality of your form, you’ll want to know when you get a new completion. This is where notifications come in.
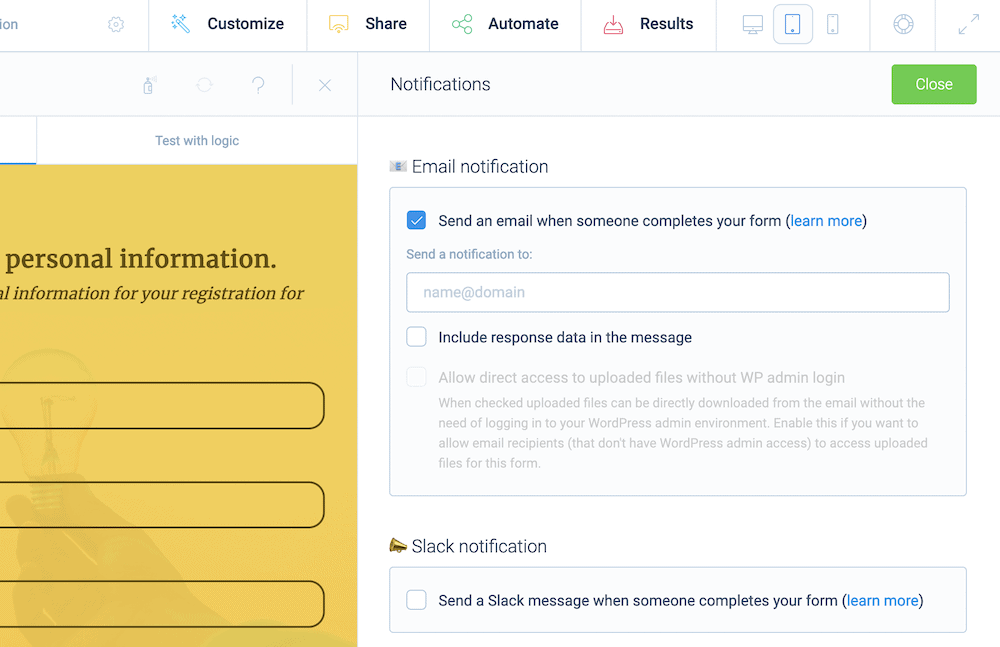
2. Set Up Email Notifications for Your Custom WordPress Registration Form
The good news is that it’s simple to set up notifications for new form completions. You can use the dedicated functionality for email and Slack notifications in the Automate menu:
You can also send notifications using a Send Email Block:
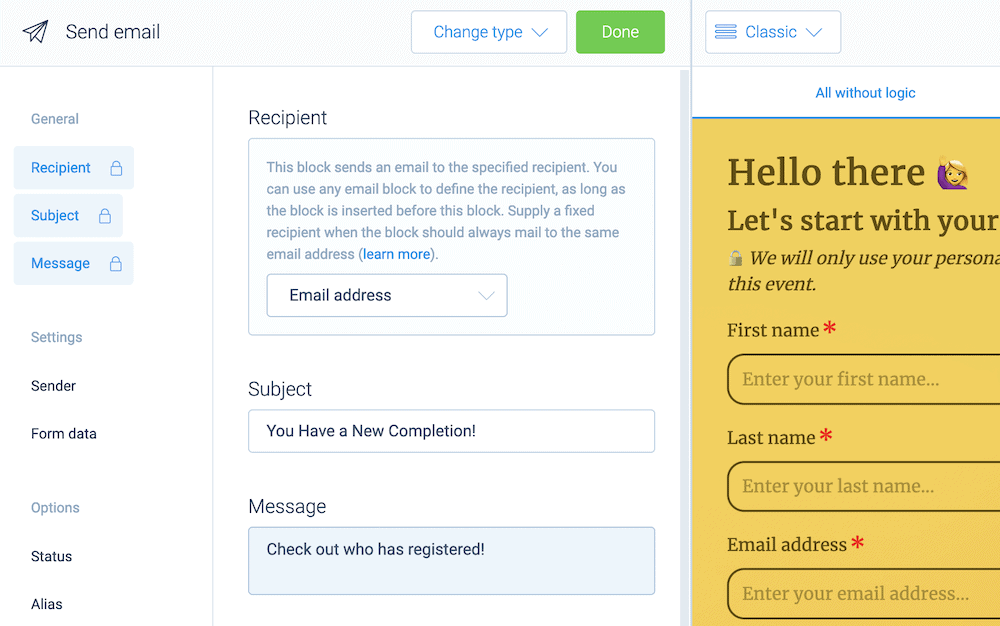
You’ll place this at the end of your form, so that you can capture all of the information you receive. /p>
What’s more, you can use webhooks to send this data to other services. You’ll access it from the Automate > Connections menu:

Once you have a webhook from your chosen service, you’ll access this menu and paste it into the relevant field:
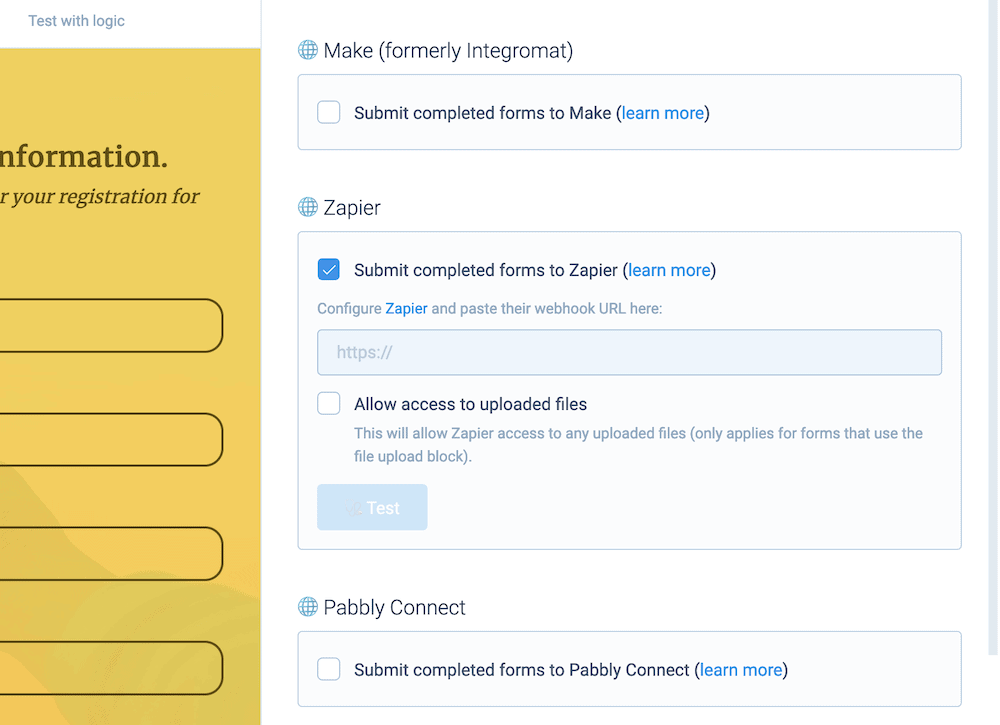
Once you do this, you can receive response data and connect whatever you collect to a third-party service (such as Google Sheets, Mailchimp, and more) using webhooks.
3. Make Sure You Test Your Custom WordPress Registration Form
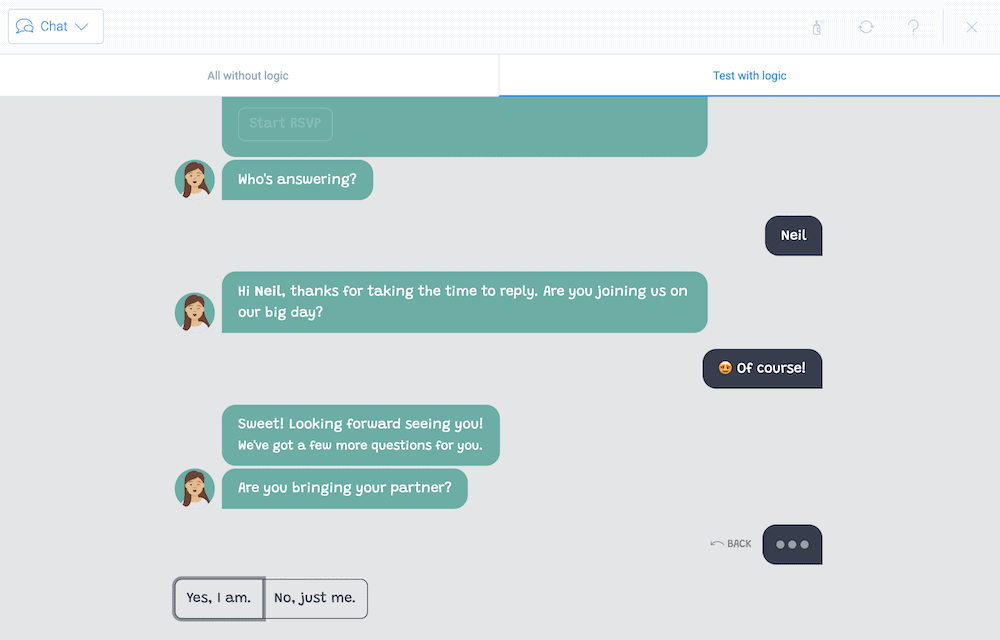
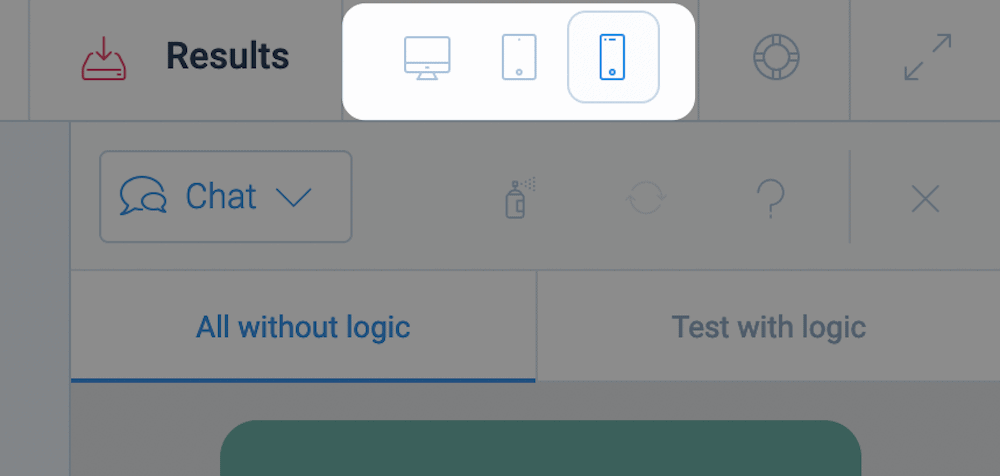
Testing your form is a crucial step that can help you knock out any bugs before you send the form live. Tripetto’s preview pane can show you your form both with and without logic:
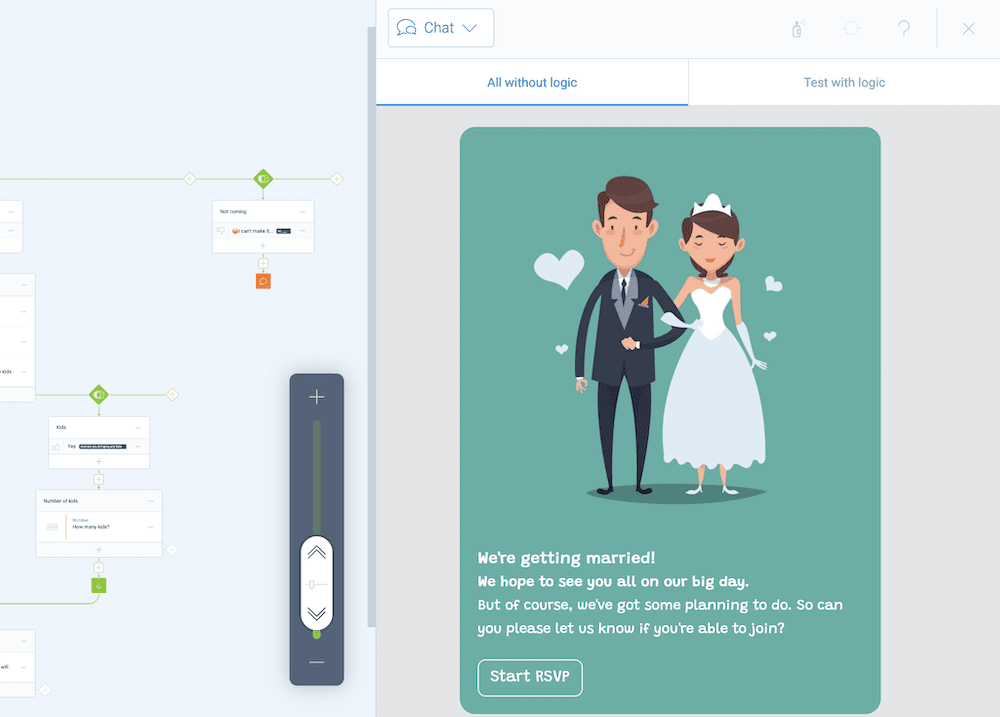
The Test with Logic option will show you exactly how your form works on the front end, and we encourage you to use this often during the creation process.
You will also want to see how your form looks on different devices too. You can select this in a flash using the dedicated viewport options in the top toolbar:
At this point, you’re ready to ship your custom WordPress registration form to the masses!
Conclusion
A registration form is arguably the best way to collect data from your WordPress site’s users. A good form will use conditional logic, design choices, and third-party integration, along with supreme usability.
Tripetto is one of the best WordPress form builder plugins to help you create conversational and smart custom WordPress registration forms. It provides customizable form faces, lots of conditional logic options, an array of customizations, and flexibility with third-party services.
What’s more, customers love the plugin, with hundreds of testimonials and many more five-star and top-rated reviews across a number of different platforms.
Tripetto’s pricing starts from $99 per year and gives you the full feature set regardless of the plan you choose; there are no hidden costs or addons. It also comes with a 14-day money-back guarantee – no questions asked.